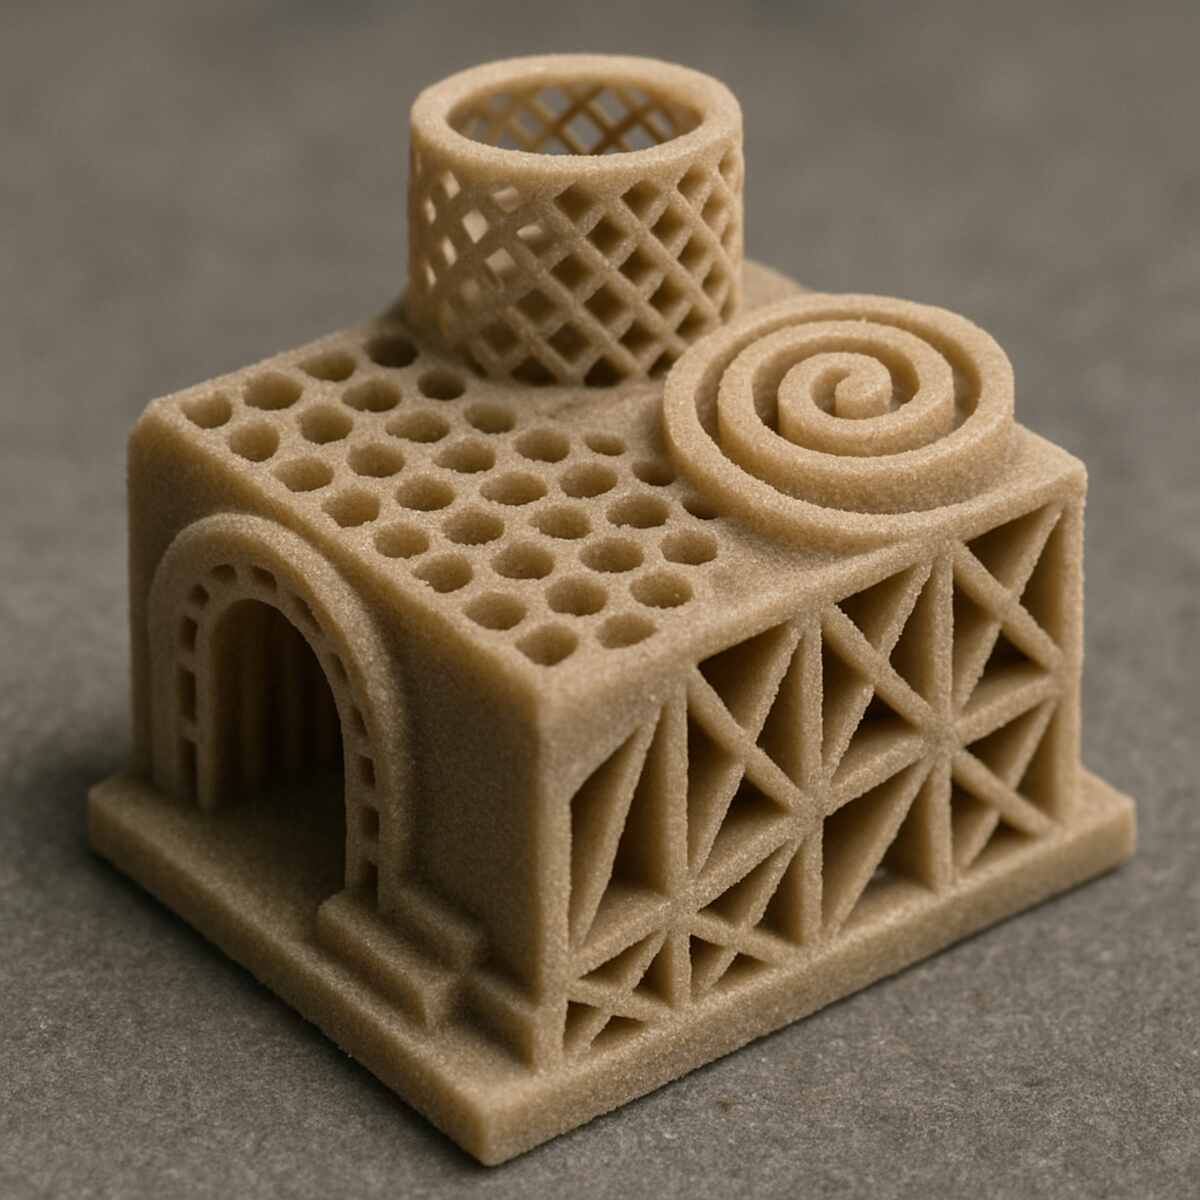
The realm of sub-micron manufacturing has been completely transformed by the advent of Two-Photon Polymerization (2PP) and high-precision direct laser writing technologies. At the forefront of this micro-fabrication revolution is the MPO100, a state-of-the-art multi-photon optics system designed to produce complex 3D structures at the micro and nanoscale. Whether you are developing advanced microfluidic chips, customized micro-optics, or intricate biomedical scaffolds, the capabilities of this machine are vast. Read the Best info about info mpo100.
However, achieving flawless prints at the nanometer scale requires a deep understanding of optics, mechanics, chemistry, and software. Even the most sophisticated laboratories encounter technical hurdles. Navigating and troubleshooting common issues with MPO100 (info mpo100) requires a systematic approach to diagnostics, from laser calibration to photoresist chemistry.
In this comprehensive, expert-level guide, we will break down the intricacies of the MPO100 system. We will explore hardware diagnostics, material science optimizations, software configurations, and environmental controls to help you maximize your system’s uptime and print quality.
1. Understanding the MPO100 Ecosystem
Before diving into specific troubleshooting steps, it is essential to understand the architectural foundation of your machine. The MPO100 relies on tightly focused femtosecond laser pulses to initiate non-linear two-photon absorption within a photosensitive resin. This localized absorption creates a tiny polymerized focal volume, known as a voxel. By moving the laser beam or the sample stage, these voxels are stitched together to form a 3D structure.
MPO100 vs Traditional DLW Systems
When evaluating MPO100 vs traditional DLW systems, several distinct differences emerge that directly impact how you troubleshoot. Traditional Direct Laser Writing (DLW) systems often rely on single-photon UV lithography, which cures resin in a linear, continuous column along the light path. In contrast, the MPO100 utilizes true 2PP. The polymerization only happens at the exact focal point where the photon density is high enough to trigger simultaneous two-photon absorption.
This gives the MPO100 true 3D writing capabilities without the need for layer-by-layer support structures in many cases. However, it also means the system is exponentially more sensitive to focal shifts, laser power fluctuations, and stage vibrations. Understanding this extreme sensitivity is the first step in effective troubleshooting.
2. Core Diagnostics: “Why is my MPO100 print failing?”
It is the most frustrating question in the lab: “Why is my MPO100 print failing?”
When an overnight print yields a glass slide with absolutely nothing on it—or worse, a collapsed mass of partially cured resin—it can be difficult to know where to begin. Two-photon polymerization printing defects generally fall into three broad categories: mechanical/hardware failures, optical/laser inconsistencies, and chemical/material issues.
Identifying the Symptoms
To diagnose a failed print, start by examining the evidence under a high-powered microscope:
- Total absence of polymer: If the slide is completely bare, the issue is typically a failure of laser power delivery, a gross focal offset (writing in the air or too deep in the glass), or an inactive photoinitiator in the resin.
- Floating or washed-away structures: The structure printed successfully but detached during the development phase. This points directly to substrate adhesion issues.
- Collapsed or distorted geometry: The structure is present but deformed. This indicates issues with slicing parameters, insufficient laser power resulting in weak crosslinking, or structural shrinkage during the post-bake.
- Micro-explosions or boiling: If you see dark, carbonized spots or bubbles inside the resin, the laser power was set far too high, causing solvent boiling or optical breakdown of the polymer.

3. Resolving Optical and Laser System Anomalies
The heart of the MPO100 is its femtosecond laser. A stable, well-aligned laser is non-negotiable for high-resolution writing.
What Causes MPO100 Laser Power Fluctuations?
Inconsistent voxel sizes and structural weaknesses are often attributed to fluctuations in laser energy. But what causes fluctuations in MPO100 laser power?
- Thermal Drift in the Oscillator: Femtosecond lasers are highly sensitive to ambient temperature changes. A temperature swing of even 1°C in the laboratory can alter the laser’s cavity alignment, resulting in power drops.
- Acousto-Optic Modulator (AOM) Degradation: The AOM controls the rapid switching and power modulation of the laser. If the AOM crystal becomes damaged or its RF driver malfunctions, power delivery to the objective will be erratic.
- Optical Component Degradation: Over time, mirrors and beam splitters can accumulate dust, or their coatings can degrade due to the high peak power of the ultrashort pulses.
Maintaining Femtosecond Laser Stability
Maintaining femtosecond laser stability requires strict environmental controls. Ensure your laboratory climate control system is rated for tight tolerances (ideally ±0.5°C). Additionally, allow the laser to warm up for the manufacturer-recommended duration—often 1 to 2 hours—before initiating a high-precision print. Rely on internal power meters to log laser stability over a 24-hour period to identify cyclical power drops related to lab HVAC systems.
Femtosecond Laser Alignment Procedures
If you have verified that the laser output is stable but the power at the objective lens is low, you may need to perform alignment checks. Proper femtosecond laser alignment procedures are highly specialized and should generally be guided by your manufacturer’s service manual or a certified technician. However, basic user-level checks include:
- Beam Profiling: Use a beam-profiling camera to ensure the beam remains perfectly circular (Gaussian profile) before it enters the objective. Astigmatism in the beam will elongate the voxel, ruining resolution.
- Collimation Checks: Ensure the beam is properly collimated. A diverging or converging beam entering the objective will shift the focal plane, altering the expected Z-axis positioning.
- Objective Lens Cleaning: A dirty objective is a common culprit. Even a microscopic spec of dust or leftover immersion oil on the lens can scatter the femtosecond pulses, drastically reducing peak intensity and preventing two-photon absorption. Clean optics with high-grade lens tissue and spectroscopic-grade solvents (such as Isopropanol or Acetone), using the “drop and drag” method to avoid scratching.
4. Hardware, Motion Control, and Precision Engineering
The MPO100 achieves its remarkable resolution not just through optics, but through ultra-precise motion control. The system typically relies on a combination of coarse mechanical stages for large travel ranges and fine piezoelectric stages for sub-nanometer positioning.
Calibrating MPO100 High-Precision Stages
When structures exhibit subtle shifts, “staircasing” on vertical walls, or stitching errors between write fields, stage calibration is likely required. Calibrating MPO100 high-precision stages involves several interconnected steps:
- Interferometric Verification: Advanced systems use laser interferometers to constantly monitor and correct stage position. Ensure the interferometer optics are clean and the signal strength is high.
- Hysteresis Compensation: Piezoelectric actuators naturally exhibit hysteresis (a lag between the applied voltage and the actual movement). The MPO100 software utilizes complex algorithms to compensate for this. If you notice repeatable geometrical distortions, the piezo calibration files may need to be updated.
- Orthogonality Checks: The X, Y, and Z axes must be perfectly perpendicular. Using a standard calibration grid, print a simple test pattern and measure it under an SEM or AFM. Any rhomboid distortion in what should be a perfect square indicates an orthogonality error that must be corrected in the system firmware.
Improving Sub-Micron Printing Accuracy
For those pushing the absolute limits of the machine, improving sub-micron printing accuracy requires eliminating external variables.
- Vibration Isolation: The MPO100 must be placed on an active vibration-isolation table. Ensure the table is properly floated. If the table bottoms out or if air lines are pinched, building vibrations (from elevators, HVAC, or even foot traffic) will couple into the print, creating wavy artifacts known as “ringing.”
- Acoustic Shielding: High-frequency sound waves can act upon the objective lens or the sample holder. Ensure the acoustic enclosure of the MPO100 is fully sealed during operation.
- Interface Finding: The most critical step for printing accuracy is correctly identifying the substrate-resin interface (i.e., the glass surface). If the auto-focus or interface-finding routine is off by even 100 nanometers, the base of your structure may not anchor properly, or the first layers may be over-exposed.
5. Material Science: Photoresists and Chemistry
Even with perfect optics and flawless stage movements, printing will fail if the chemistry is wrong. The interaction between the femtosecond laser and the photoresist is a delicate balance of photochemistry and thermal dynamics.
How to Fix Resin Adhesion Issues?
Perhaps the most frequently encountered problem is poor adhesion. You check your print, and the structure has simply vanished, washed away in the developer bath. How to fix resin adhesion issues?
- Immaculate Substrate Cleaning: Glass coverslips must be surgically clean. Standard protocols involve sequential sonication in acetone, isopropanol, and deionized water, followed by drying with high-purity nitrogen.
- Oxygen Plasma Treatment: For highly demanding prints, treat the glass substrates with oxygen plasma for 1–2 minutes just before use. This removes the final monolayers of organic contaminants and activates the glass surface with hydroxyl groups, making it highly hydrophilic.
- Silanization (Chemical Coupling): For ultimate adhesion, use a silane coupling agent (such as MAPTMS). Silanes act as chemical bridges, with one end covalently bonding to the glass and the other end integrating into the photoresist’s polymer network during the laser-writing process.
- Optimizing the Interface Write Strategy: When writing the very first layers on the glass, reduce the stage speed and slightly increase the laser power to ensure a robust anchor layer. Some users choose to print a solid “raft” or baseplate slightly wider than the structure itself to maximize the surface area in contact with the glass.
Best Photoresists for Multi-Photon Optics
Choosing the right material is half the battle. The best photoresists for multi-photon optics depend entirely on your application:
- ORMOCERs (e.g., OrmoComp): Inorganic-organic hybrid polymers are favored for micro-optics and photonic wire bonding due to their excellent optical transparency, high thermal stability, and low shrinkage.
- IP-Series Resins (e.g., IP-Dip, IP-S): Commonly used in high-resolution DLW, these resins are optimized for different objective lenses. IP-Dip, for instance, matches the refractive index of the objective’s immersion oil, eliminating spherical aberrations when writing tall structures.
- Hydrogels and Biocompatible Resins: For biological applications, natural and synthetic hydrogels (like GelMA or PEGDA) can be used, though they require highly specialized, water-soluble photoinitiators that respond to two-photon absorption.
Handling Shrinkage and Deformation
All photopolymers shrink upon crosslinking. If you are printing a highly complex, free-hanging structure, shrinkage can cause the part to warp or snap. To mitigate this, ensure your laser dose is sufficient to achieve a high degree of conversion during the write process. Furthermore, post-print processing (such as UV curing or thermal baking) should be performed slowly to avoid inducing internal thermal stresses.
6. Perfecting Surface Finish and Print Speed
In applications such as micro-optics, the structural shape alone is not sufficient; the surface must be optically smooth to prevent light scattering.
Resolving Micro-Optics Surface Roughness Problems
If your micro-lenses or optical waveguides look cloudy under an SEM, you are dealing with surface roughness. Resolving micro-optics surface roughness problems involves fine-tuning your slicing and hatching parameters.
- Slicing Distance (Z-axis): The vertical distance between printed layers. If the distance is too large, the voxels won’t overlap sufficiently, creating a ribbed, stair-step effect. Reducing the slicing distance drastically improves smoothness.
- Hatching Distance (X/Y-axis): The distance between parallel laser lines within a single layer. A tighter hatching distance ensures a dense, smooth fill.
- Contour Passes: The most effective technique for smooth surfaces is the “core-shell” writing strategy. Print the internal volume (core) with larger slicing/hatching distances and higher speed to save time. Then, write a fine outer shell (contour) using very tight slicing and overlapping passes. This guarantees an optically smooth exterior without exponentially increasing print time.
Optimizing MPO100 Print Speed and Quality
There is an inherent trade-off between speed and quality. Optimizing MPO100 print speed and quality requires balancing the laser scanning speed with the laser power.
- The Dose Equation: Polymerization depends on the total energy dose delivered to the focal volume. If you double the stage scanning speed, you must increase the laser power to maintain the same dose.
- Galvo vs. Stage Scanning: For extremely fast printing, utilize the MPO100’s galvanometric mirrors to sweep the laser beam rapidly across the X/Y field, rather than moving the heavy sample stage. Stage movement should be reserved for stepping between write fields or large, continuous contours.
- Voxel Tuning: By intentionally under-exposing the resin, you can create smaller voxels (below the diffraction limit), which allow finer details but require more overlapping passes, slowing the print. Conversely, higher power produces a larger voxel, enabling rapid structural filling.
7. Software Diagnostics and Data Pipeline
Behind every successful print is a flawless digital pipeline. Transforming a CAD model into a physical micro-structure involves complex algorithms, and errors here will completely derail your process.
Correcting 3D Lithography Software Errors
The software interface (often referred to within user communities as the info mpo100 system interface) dictates slicing, hatching, stage routing, and laser modulation. Correcting errors in 3D lithography software starts with the source file.
- Non-Manifold Geometry: The MPO100 software requires “watertight” STL or OBJ files. If your CAD model has inverted normals, holes, or intersecting internal faces, the slicing software will become confused, leading to skipped layers or random laser firings. Run your 3D models through a mesh repair tool before importing them.
- Memory Overload: Sub-micron printing generates massive toolpath files. A complex micro-scaffold might contain millions of coordinates. If the software crashes during slicing, ensure your workstation has sufficient RAM and consider simplifying the model or breaking the print into separate, sequential jobs.
- Write Field Stitching Errors: If your model is larger than a single optical field of view, the software must “stitch” multiple fields together by moving the stage. Ensure the overlap parameters are correctly set. Too much overlap creates localized over-exposure (burning); too little overlap creates weak seams where the structure will inevitably fracture.
High-Resolution 3D Printing Error Codes
Familiarizing yourself with system logs is vital. When the machine halts, it usually generates a specific code. While exact codes vary by firmware version, understanding the categories of high-resolution 3D printing error codes will speed up diagnostics:
- Axis Following Errors (e.g., Code E-104): The physical stage could not follow the commanded trajectory. This usually happens if the requested acceleration is too high or if there is mechanical binding in the stage rails. Lower the stage speed or contact maintenance for lubrication.
- Laser Interlock Errors (e.g., Code L-200): The laser shutter closed unexpectedly. This is a safety feature. It could mean that an enclosure door was bumped or that the laser’s internal temperature sensors detected an anomaly. Check lab cooling systems and ensure the chassis is secure.
- Z-Tracking / Autofocus Failures (e.g., Code Z-005): The system lost the reflection signal used to maintain the substrate interface. This happens if the glass slide is excessively dirty, scratched, or tilted beyond the stage’s ability to compensate. Re-clean the substrate and ensure it is clamped perfectly flat.
8. Preventative Maintenance and Best Practices
The secret to avoiding the need for constant troubleshooting is a rigorous preventative maintenance schedule. High-precision instruments degrade rapidly if neglected.
Direct Laser Writing System Maintenance
Routine Direct Laser Writing system maintenance should be treated as a strict laboratory protocol:
- Daily: Inspect and clean the objective lenses. Check the substrate holders for resin spills. Ensure the vibration isolation table is floating freely.
- Weekly: Perform a test print using a standard calibration structure (like a microscopic resolution chart or a set of pillars). Measure this test print under an SEM to monitor for gradual laser power degradation or stage drift over time.
- Monthly: Backup all calibration files and machine configurations. Check the cooling water levels for the laser chiller and inspect the air filters on the acoustic enclosure.
- Annually: Schedule a comprehensive preventative maintenance visit from the manufacturer. They will check the internal optics, recalibrate the interferometers, and tune the laser cavity—tasks that require specialized metrology equipment.
Accessing the Knowledge Base (info mpo100)
Do not troubleshoot in a vacuum. Utilize the official documentation, user manuals, and online portals typically referenced as info mpo100. Manufacturer portals often contain updated slicing software, material safety data sheets (MSDS) for new photoresists, and firmware patches that solve known bugs. Engaging with the broader scientific community of DLW users can also provide empirical solutions to highly niche printing problems.
Conclusion
Mastering the MPO100 is an ongoing journey of scientific discovery and engineering discipline. Troubleshooting common issues with MPO100 (info mpo100) requires patience, a methodical mindset, and a deep appreciation for the physics of multi-photon lithography.
By taking a systematic approach to diagnostics—whether you are questioning “Why is my MPO100 print failing?”, calibrating stages, tweaking laser power, or refining your resin chemistry—you can drastically reduce downtime and push the boundaries of what is possible in sub-micron manufacturing. Remember that perfect prints are a symphony of stable lasers, precise motion control, robust photochemistry, and optimized software. Maintain your equipment diligently, keep your optics pristine, and your MPO100 will continue to turn your most complex micro-scale designs into reality.