


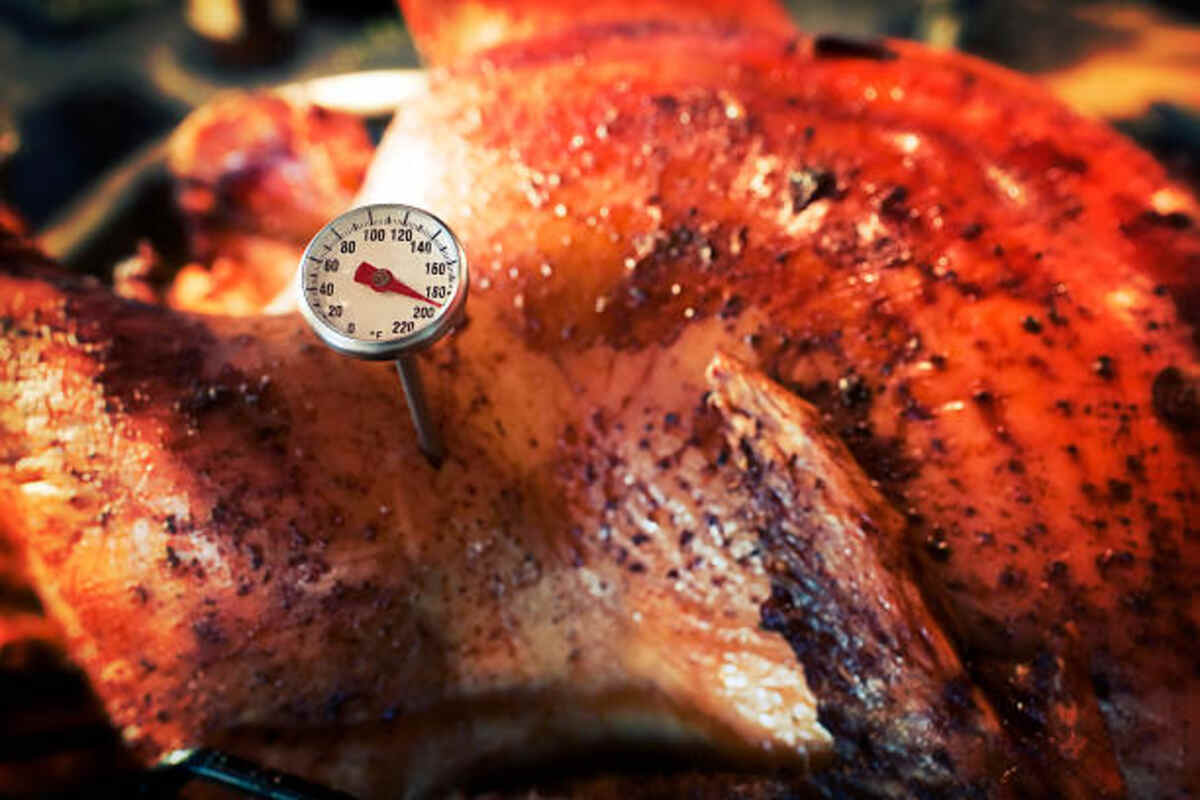
How to Choose the Right Meat Thermometer
Whether you are hosting a backyard summer barbecue, preparing a Thanksgiving turkey, or simply cooking a weeknight chicken breast, precision is the secret ingredient to culinary perfection. Far too many home cooks rely on outdated methods like poking the meat to gauge its firmness, cutting it open to check the color, or strictly following recipe cooking times. Unfortunately, these methods often lead to dry, overcooked poultry or unsafely undercooked pork. The only foolproof way to guarantee perfectly cooked, safe, and juicy food every single time is by understanding how to choose the right meat thermometer for your specific kitchen needs.
Navigating the market of kitchen gadgets can be overwhelming. Today’s thermometers range from simple analog dials you can buy for a few dollars to high-tech, smart-home integrated devices that send real-time temperature graphs directly to your smartphone. With so many options, how do you determine which device is actually worth your investment?
In this comprehensive guide, we will explore everything you need to know to make an informed decision. We will break down sensor technologies, connectivity options, design features, and proper maintenance. Whether you are a competitive pitmaster managing a 14-hour brisket smoke or a busy parent trying to get dinner on the table, this guide will equip you with the knowledge to elevate your cooking.

The Core Technology: Understanding Thermometer Sensors
At the heart of every digital kitchen thermometer is its sensor. While two thermometers might look identical on the outside, the technology hidden inside their metal probes dictates how fast and accurate they are. When comparing devices, you will inevitably run into the debate of thermocouple vs thermistor sensors. Understanding this difference is step one in making a smart purchase.
Thermocouple Sensors
A thermocouple is the gold standard for speed and accuracy in the culinary world. This technology utilizes two electrical wires made of different metals, welded together at the very tip of the probe. As the temperature at the tip changes, it creates a minute electrical voltage that the thermometer’s computer chip translates into a temperature reading.
The Pros:
- Blazing Speed: Thermocouples offer incredible thermometer response time and precision, usually locking in on an accurate reading in 1 to 3 seconds.
- Pinpoint Accuracy: Because the sensor junction is located at the absolute microscopic tip of the probe, you can measure the temperature of specific, exact layers of the meat.
- Perfect for Thin Foods: Because the reading happens exactly at the tip, a thermocouple is widely considered the best food thermometer for thin cuts like smash burgers, skirt steaks, or delicate fish fillets.
The Cons:
- Price: Manufacturing thermocouples is expensive, meaning these thermometers typically come with a premium price tag.
- Delicacy: While highly advanced, the fine wires inside can be more fragile than other sensors if the probe is severely bent or crushed.
Thermistor Sensors
Most budget and mid-range digital thermometers use thermistor (thermal resistor) technology. Inside the probe is a small ceramic or polymer resistor that changes its electrical resistance based on the ambient temperature.
The Pros:
- Affordability: Thermistors are much cheaper to produce, making these thermometers highly accessible for everyday home cooks.
- Reliability: They are robust and can withstand standard kitchen wear and tear quite well.
The Cons:
- Slower Response Times: A thermistor usually takes between 4 to 10 seconds to stabilize and give an accurate reading. When your hand is hovering over a roaring 500-degree grill, those extra five seconds can feel like an eternity.
- Thicker Probes: Thermistor sensors are physically larger than thermocouple junctions. They require the meat to cover a larger portion of the probe (usually the bottom half-inch) to get an accurate reading, making them less ideal for very thin cuts of meat.

Instant-Read vs Leave-In Probes: Which Do You Need?
Once you understand the sensors, the next major decision is the physical style of the thermometer. The culinary world generally divides these devices into two main categories: instant-read vs leave-in probes. Choosing between them depends entirely on how and what you cook most frequently.
The Instant-Read Thermometer
An instant-read thermometer is designed for exactly what the name implies: quick, on-the-fly temperature checks. You insert the probe into the meat, read the temperature, and immediately remove it. You never leave an instant-read thermometer inside the meat while it cooks.
Ideal Use Cases:
- Grilling steaks, burgers, and hot dogs.
- Checking the doneness of pan-seared chicken breasts.
- Testing multiple pieces of food quickly, such as a tray of meatballs.
Why You Need One: The primary advantage here is mobility and speed. An instant-read device allows you to rapidly probe different areas of a large roast or quickly check ten different chicken thighs on a crowded grill to see which ones are ready to be pulled off and which need more time.
The Leave-In Thermometer
Leave-in thermometers feature a probe connected to a heat-resistant wire (or, increasingly, a fully wireless system) that connects to an external display. You insert the probe into the raw meat before the cooking process begins, and it stays inside the food for the entire duration of the cook.
Ideal Use Cases:
- Smoking large cuts of meat like pork butts, briskets, and ribs.
- Roasting whole turkeys, chickens, or prime rib in the oven.
- Reverse-searing thick steaks where precise ambient and internal tracking is required.
Oven-Safe Leave-In Probe Benefits: The most significant advantage is continuous monitoring. You never have to open the oven door or smoker lid to check the temperature, which prevents heat loss and maintains a consistent cooking environment. You can set an alarm to alert you the exact moment your prime rib hits 130°F (54°C). This hands-off approach eliminates the anxiety of overcooking expensive centerpieces during the holidays.
Pro Tip for the Ultimate Kitchen: Most serious cooks eventually realize they need both. A leave-in probe manages the long, slow cooks, while an instant-read thermometer handles the quick-searing tasks and final spot-checks.

The Smart Kitchen: Wireless and Connected Thermometers
In recent years, the barbecue and culinary world has been revolutionized by smart connectivity. For those who love slow cooking, smoking, or entertaining while the food cooks, a wireless thermometer is a game-changer. However, you must choose your connectivity method wisely.
Bluetooth vs WiFi Grilling Thermometers
When looking at smart thermometers, the primary distinction is how they transmit data to your smartphone or tablet.
Bluetooth Thermometers: These devices connect directly to your phone.
- Pros: They are incredibly easy to set up, don’t require an internet connection (great for camping or tailgating), and are generally more affordable.
- Cons: The range is strictly limited. While manufacturers often claim a range of 100 to 300 feet, physical obstacles like brick walls, glass doors, and the metal body of your grill will significantly cut that distance. If you walk to the front of your house or go inside to prep side dishes, you might lose the connection.
WiFi Thermometers: These thermometers connect to your home’s internet router, pushing the temperature data to a cloud server, which your phone then accesses.
- Pros: Unlimited range. As long as your thermometer is connected to your home WiFi and your phone has an internet connection (even cellular data), you can check on your brisket from the grocery store, the office, or the couch.
- Cons: They require a stable internet connection, take a bit more technical setup, and consume battery power much faster than Bluetooth models.
Dual-Sensor Remote Meat Thermometers
If you are serious about outdoor cooking, you should look for dual-sensor remote meat thermometers. These advanced devices measure two temperatures simultaneously: the internal temperature of the meat and the ambient temperature of your grill or smoker.
Why is ambient temperature important? The built-in dome thermometers on most grills and smokers are notoriously inaccurate, often reading 50 degrees hotter or cooler than the actual temperature where the meat is sitting (the grate level). A dual-sensor probe tells you exactly what temperature the meat is experiencing, allowing you to adjust your vents or gas dials with absolute precision.
The Best Wireless Thermometer for Smokers
When shopping for the best wireless thermometer for smokers, look for devices that are “truly wireless.” Modern innovations have eliminated the braided metal wires entirely. These sleek, wire-free probes look like thick metal toothpicks that you insert entirely into the meat. The ambient sensor sits at the exposed base of the probe, while the internal sensor sits near the tip. They use Bluetooth to communicate with a charging block, which then acts as a WiFi bridge to your phone. This completely wire-free setup is revolutionary for rotisserie cooking or wrapping briskets in butcher paper, as there are no tangled wires to fight with.

Design, Durability, and Readability
A thermometer is only useful if it survives the harsh environment of a kitchen and is easy to use in the heat of the moment. When assessing how to choose the right meat thermometer, you must look closely at its physical construction.
Food-Grade Stainless Steel Probe Benefits
Always ensure the probe itself is constructed from high-quality, food-grade stainless steel (usually 304 or 316 grade). The food-grade stainless steel probe benefits go far beyond simple aesthetics:
- Corrosion Resistance: Stainless steel will not rust when exposed to meat juices, marinades, or acidic ingredients like lemon juice and vinegar.
- Hygiene: The non-porous surface of stainless steel prevents bacteria from hiding in microscopic crevices, making it incredibly easy to sanitize between uses (which is crucial when moving from raw chicken to cooked foods).
- High Heat Tolerance: Quality stainless steel will not warp, melt, or leach metallic flavors into your food, even when exposed to high-heat searing environments.
Waterproof Digital Kitchen Thermometer Features
Kitchens are messy. Grilling outdoors exposes you to sudden rainstorms. Therefore, prioritizing waterproof digital kitchen thermometer features is highly recommended. Look for an IP (Ingress Protection) rating.
- An IP65 rating means the device is protected against water jets, meaning you can safely wash it under a running faucet.
- An IP67 rating means the device can be fully submerged in up to a meter of water for 30 minutes without damage.
A fully waterproof thermometer gives you the peace of mind to scrub away grease and sticky barbecue sauces without fear of frying the internal circuitry.
Digital Display vs Analog Dial Readability
While old-school analog dial thermometers have a rustic charm and require no batteries, they fall remarkably short in terms of readability. The battle of digital display vs analog dial readability is decisively won by modern digital screens.
Analog dials are often cluttered with tiny numbers and confusing meat graphics, making them incredibly difficult to read quickly—especially in low light or if your eyesight isn’t perfect. Furthermore, analog dials can fog up from steam.
Digital displays, particularly those with brightly backlit LCD or OLED screens, offer bold, clear numbers that can be read from a distance or in the pitch-black conditions of a late-night winter grilling session. Many modern instant-read thermometers also feature auto-rotating displays, meaning the numbers flip right-side up regardless of whether you are holding the device in your left or right hand.

Specialized Thermometers: Surface vs Internal
While this guide focuses primarily on internal meat temperature, it is important to address another tool you will frequently see in professional kitchens: the infrared thermometer.
Infrared vs Digital Meat Probes
Understanding infrared vs digital meat probes is crucial so you don’t buy the wrong tool for the job.
Infrared Thermometers (Temperature Guns): These devices shoot a laser to measure the thermal radiation emitting from the surface of an object. They do not penetrate the food.
- What they are good for: Checking the surface temperature of a cast-iron skillet before searing a steak, verifying the temperature of a pizza stone, or checking the ambient temperature of a flat-top griddle.
- What they are BAD for: Checking if meat is cooked. An infrared gun will tell you the crust of your steak is 400°F (204°C), but it has absolutely no idea if the inside is raw, medium-rare, or well-done.
Digital Meat Probes: These physically penetrate the food to read the internal temperature, which is the only metric that dictates food safety and doneness. You cannot use an infrared gun as a substitute for a probe thermometer.
Proper Meat Thermometer Use
Owning a high-quality, perfectly calibrated thermometer is useless if you don’t know how to insert it properly. Incorrect placement is the number one reason home cooks end up with poorly cooked meals, even when using expensive gear. Proper meat thermometer use requires a basic understanding of meat anatomy and heat transfer.
The Thickest Part Rule
The golden rule of meat thermometer use is to always insert the probe into the absolute thickest part of the meat. The thickest part takes the longest to cook, meaning if that center point is safe to eat, the rest of the cut is guaranteed to be safe as well.
Avoid Bone, Fat, and Gristle
Meat is primarily composed of water and protein. Bones and large pockets of fat conduct heat differently than muscle tissue. If the tip of your probe is resting against a bone, it may read artificially high, tricking you into taking the meat off the heat before the actual muscle tissue is fully cooked. Always aim for the center of the dense muscle.
How to Probe Specific Meats
- Whole Poultry (Turkey/Chicken): The thickest part of the bird is the inner thigh area, right where the leg joins the breast. Insert the probe deep into the thigh, taking care not to touch the femur bone. You should also take a secondary reading in the thickest part of the breast.
- Steaks and Chops: For thick cuts, insert the probe horizontally from the side. Poking a steak from the top down often pushes the probe completely through the meat, resulting in a reading of the hot pan underneath rather than the meat’s center.
- Thin Cuts (Burgers, Skirt Steak, Fish): As mentioned earlier, finding the best food thermometer for thin cuts usually leads you to a thermocouple. Even then, you must insert the probe horizontally through the side of the burger patty or fish fillet to ensure the sensor is fully submerged in the center of the food.
The Ultimate Meat Temperature Guide
Once you have your accurate reading, you need to know what those numbers mean. It is vital to understand the difference between USDA safe minimum internal temperatures and chef-recommended culinary temperatures.
The USDA sets guidelines based on absolute food safety, designed to instantaneously kill harmful pathogens like Salmonella and E. coli. However, many culinary professionals argue that following USDA guidelines strictly for cuts like steak and pork chops results in overcooked, dry food.
Below is a comprehensive meat temperature guide that covers both safety and culinary perfection.
Poultry (Chicken, Turkey, Duck)
- USDA Safe Minimum: 165°F (74°C)
- Culinary Note: Poultry must be fully cooked to ensure safety. However, white meat (breasts) tends to dry out quickly past 165°F. Dark meat (thighs and drumsticks) contains more connective tissue and actually benefits from being cooked slightly higher, up to 175°F – 180°F, which allows the collagen to melt and makes the meat more tender and juicy.
- Carryover Cooking: If you take a turkey out of the oven at 160°F and let it rest, the residual heat will carry the internal temperature up to the safe 165°F mark while it sits on the counter.
Beef and Lamb (Steaks and Roasts)
- USDA Safe Minimum: 145°F (63°C) with a 3-minute rest time.
- Culinary Note: For most steak lovers, 145°F is medium-well to well-done. Pathogens on whole-muscle beef cuts live only on the surface, which is why seared steaks can be eaten rare.
- Rare: 120°F – 125°F (Cool red center)
- Medium-Rare: 130°F – 135°F (Warm red center – Chef Recommended)
- Medium: 140°F – 145°F (Warm pink center)
- Medium-Well: 150°F – 155°F (Slightly pink center)
- Well-Done: 160°F+ (Little or no pink)
Note: Ground beef is an exception. Because the meat is ground, surface bacteria is mixed throughout the patty. The USDA recommends cooking ground beef to 160°F (71°C) to ensure safety.
Pork (Chops, Roasts)
- USDA Safe Minimum: 145°F (63°C) with a 3-minute rest.
- Culinary Note: Decades ago, the USDA recommended cooking pork to 160°F due to the fear of trichinosis. Modern farming practices have virtually eliminated this parasite in commercial pork. Today, cooking a pork chop to 145°F (which leaves a beautiful, slight blush of pink in the center) results in incredibly juicy, safe, and tender meat.
- Barbecue Exception: If you are smoking a pork shoulder (butt) for pulled pork, you do not stop at 145°F. You must cook tough cuts of pork to roughly 200°F – 205°F (93°C – 96°C) to break down the tough connective tissues and render the fat, allowing the meat to shred easily.
Fish and Seafood
- USDA Safe Minimum: 145°F (63°C)
- Culinary Note: Fish cooks incredibly fast. Many chefs prefer taking salmon off the heat around 125°F – 130°F for a more tender, flaky texture, as fish becomes very dry when taken to 145°F.
Maintenance: Calibration and Troubleshooting
A thermometer is a precision instrument. Over time, due to being dropped, exposed to extreme temperature swings, or simply aging, its calibration can drift. If your thermometer is reading 5 degrees too hot, you could be ruining expensive cuts of meat without realizing it.
How to Calibrate a Meat Thermometer for Accuracy
Knowing how to calibrate a meat thermometer for accuracy is a fundamental kitchen skill. Most high-quality digital thermometers offer a calibration feature (usually by holding down a specific button combination). But before you adjust the device, you must test its accuracy using one of two foolproof scientific constants: freezing water or boiling water.
The Ice Bath Test (Recommended Method): This is the most reliable method for home cooks, as water always freezes at exactly 32°F (0°C).
- Fill a tall glass to the absolute brim with crushed ice (crushed ice works much better than large cubes).
- Add cold tap water to fill the gaps between the ice, stopping about a half-inch below the rim.
- Stir the mixture and let it sit for two minutes to allow the temperature to equalize.
- Insert your thermometer probe roughly two inches into the center of the ice mixture. Crucial: Do not let the probe touch the bottom or sides of the glass.
- Stir the probe around gently. The thermometer should read exactly 32°F (0°C). If it reads 34°F, your thermometer is running 2 degrees too hot. Use your device’s calibration function to adjust it down to 32°F.
The Boiling Water Test: Water boils at 212°F (100°C) at sea level.
- Bring a pot of clean water to a rapid, rolling boil.
- Insert the probe into the center of the boiling water, avoiding the sides and bottom of the pot.
- The thermometer should read 212°F. Important Caveat: The boiling point of water changes with altitude. If you live in Denver, Colorado (elevation ~5,200 ft), water boils at roughly 202°F. If you use the boiling water method, you must look up the exact boiling point of water for your specific altitude and atmospheric pressure, making this method slightly more complex than the ice bath test.
Signs of a Broken Meat Thermometer
Even with proper care, digital devices eventually reach the end of their lifespan. Recognizing the signs of a broken meat thermometer will save you from a dinner disaster.
- Erratic Temperature Jumps: If your thermometer reads 120°F, then jumps to 180°F, then drops back to 90°F while sitting in the same piece of meat, the internal sensor is failing.
- “LLL” or “HHH” Error Codes: This usually indicates a broken connection in the wire (for leave-in probes) or that the thermometer has been exposed to temperatures beyond its maximum threshold, frying the sensor.
- Failure to Read Room Temperature: A healthy thermometer should display your kitchen’s ambient temperature (usually around 70°F) when sitting on the counter. If it reads 32°F while sitting on the counter, it is completely broken.
- Frayed Wires: On leave-in probes, crimped, frayed, or melted wires are a guaranteed sign of impending failure. Replacement probes are usually cheap and easy to order from the manufacturer.
Unconventional Uses: Beyond Meat
Once you invest in a good thermometer, you will realize it is a multi-purpose tool. However, a common question arises: can I use a meat thermometer for oil?
Frying, Candy, and Baking
The short answer is: Yes, but with significant caveats.
If you are wondering, “can I use a meat thermometer for oil?” to check the temperature for deep frying chicken or making donuts, you can absolutely use an instant-read meat thermometer to spot-check the oil. Most quality meat thermometers can read up to 572°F (300°C), well above the 350°F to 375°F range required for frying.
However, they are not the ideal tool for this job for a few reasons:
- Length: Meat thermometer probes are typically 3 to 5 inches long. When hovering your hand over a pot of violently bubbling 375°F oil, a 4-inch probe puts your knuckles dangerously close to severe grease splatters. Deep fry and candy thermometers usually feature 8 to 12-inch probes for safety.
- No Pot Clip: Frying and candy making require constant temperature monitoring as you adjust the stove dials. A dedicated fry thermometer has a clip that attaches to the side of the pot, freeing your hands. An instant-read meat thermometer requires you to stand there and hold it.
- Steam Burns: Holding a short instant-read thermometer over a pot of boiling sugar or oil exposes your hand to intense, rising steam.
Baking Bread and Cakes: Where a meat thermometer truly shines outside of the savory realm is in baking.
- Bread: Tired of dense, gummy sourdough? A fully baked loaf of artisan bread will register an internal temperature of 190°F to 210°F. Probing the center of your loaf is a fantastic way to ensure it is cooked through.
- Cakes: Instead of the old “toothpick test” (which relies on visually assessing wet batter), probe the center of your cake. Most cakes are perfectly baked and moist at an internal temperature of 200°F to 210°F.
- Water for Yeast: When activating active dry yeast, the water must be warm enough to wake the yeast, but not so hot that it kills it. Using your thermometer to ensure the water is exactly 105°F to 115°F guarantees a perfect bloom every time.
Factors to Consider When Buying: A Quick Checklist
To summarize how to choose the right meat thermometer, keep this buying checklist in mind before you check out:
- Budget: Are you a casual cook or a hardcore BBQ enthusiast? A quality thermistor instant-read can be found for $15-$30, while a high-end thermocouple or WiFi smart probe will run $75-$150+.
- Speed: Does a 2-second thermometer response time and precision matter to you? If you grill over high heat often, pay the premium for speed.
- Screen: Evaluate the digital display vs analog dial readability. Ensure it has a backlight for evening cooking.
- Durability: Check for waterproof digital kitchen thermometer features (IP65 or higher).
- Cooking Style: If you cook thin steaks and burgers, prioritize an instant-read with a fine-tipped probe. If you smoke briskets or roast turkeys, prioritize oven-safe leave-in probe benefits with smart connectivity.
- Warranty: Good brands stand by their sensors. Look for a warranty of at least 2 to 5 years, as cheap thermometers are notorious for breaking after a single season.
Frequently Asked Questions (FAQ)
To provide an even deeper level of insight, let’s address some of the most common questions home cooks have regarding meat thermometer use and purchasing.
Q: Can I leave an instant-read thermometer in the oven? A: Absolutely not. The plastic housing and digital screen of an instant-read thermometer will melt almost immediately in a hot oven, destroying the device and potentially ruining your food with melted plastic. Only use probes specifically designated as “oven-safe leave-in.”
Q: Do I need to wash my thermometer between temperature checks? A: Yes, if the meat is not yet fully cooked. If you probe a chicken breast at 130°F, the probe has just been exposed to raw chicken juices and bacteria. If you wait five minutes and probe it again with the unwashed thermometer, you are reintroducing that bacteria into the meat. Keep an alcohol wipe or a soapy sponge nearby to sanitize the food-grade stainless steel probe between checks until the meat reaches a safe temperature.
Q: Why does my thermometer read a different temperature in different parts of the same steak? A: Meat does not cook perfectly evenly. The edges cook faster than the center, and areas near fat or bone heat differently than pure muscle. This is normal. Always rely on the temperature reading from the absolute thickest, coolest part of the meat to gauge doneness.
Q: Is it worth upgrading from a Bluetooth to a WiFi thermometer? A: If you find yourself frequently walking away from your smoker or oven—such as running to the hardware store for more wood chunks, doing yard work, or going inside to watch a football game—the upgrade is highly recommended. The lack of range limitations on WiFi models removes the stress of losing connection, making it the best wireless thermometer for smokers who value their freedom.
Q: Will poking my meat with a thermometer let all the juices run out? A: This is a common culinary myth. While a tiny drop of juice may escape from the puncture hole, meat is not a balloon filled with liquid. It is composed of millions of microscopic muscle fibers. A tiny thermometer puncture damages an incredibly negligible amount of fibers. The moisture you “lose” from a probe hole is virtually zero compared to the massive amount of moisture you will lose if you overcook the meat by guessing its doneness. Always use your thermometer.
Conclusion
Mastering the culinary arts doesn’t require a culinary degree or a kitchen full of expensive, specialized equipment. However, it does require precision, and precision requires the right tools. Learning how to choose the right meat thermometer is a foundational step in taking your cooking from mediocre to exceptional.
By understanding the physics of thermocouple vs thermistor sensors, weighing the mobility of instant-read vs leave-in probes, and embracing modern technology like Bluetooth vs WiFi grilling thermometers, you can tailor your purchase to fit your exact cooking style.
Stop cutting into your beautiful steaks to see if they are done. Stop serving dry, anxiety-inducing turkey at Thanksgiving. Invest in a high-quality, fast, and accurate meat thermometer. Treat it well, calibrate it regularly, and utilize it faithfully. You will be rewarded with perfectly cooked, juicy, and safely prepared meals for years to come. Your family, your guests, and your palate will thank you.
