Floor sanding can be difficult work that requires patience and skill to execute successfully. Without proper guidance or instruction, it can easily damage the floor or adversely alter the results. The Amazing fact about London floor sanding.
An experienced professional can guide you through the equipment, explaining how to select and use each grit in the correct sequence.
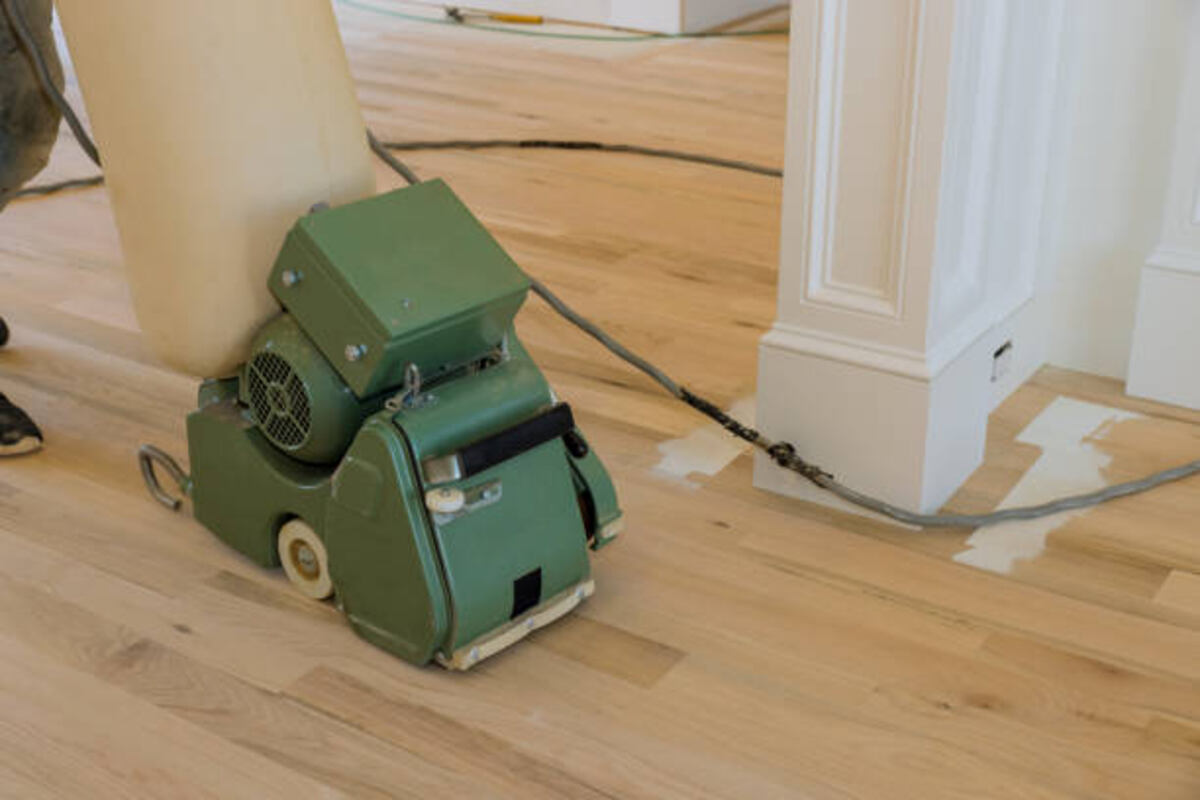
The Equipment
First and foremost, the appropriate equipment must be obtained. A sanding machine explicitly designed for floor use can be rented from a tool rental yard or home center with dedicated tool rental sections; prior to beginning this task, it would be prudent to test it on some plywood as a preliminary test run.
There are various kinds of sanding machines on the market, ranging from handheld orbital sanders used for light surface coverage to drum and belt sanders capable of stripping floors down to their core in record time. While these powerful sanders require considerable physical strength to use safely and responsibly, an unknowable or inexperienced operator could cause irreparable damage to them.
Once the appropriate machines have been acquired, they should be prepared and set up for their task. Flooring must be thoroughly swept and vacuumed prior to any work commencing, nail holes filled in with wood filler as necessary, low-hanging light fixtures raised higher up on walls where possible, and any nail heads caught by sandpaper belts removed—depending on the grit used by the sender.
Additional tools that should be considered are dust masks, metal scrapers (to remove nails and sharp objects from boards), sweeping brooms and vacuum cleaners after each grit sequence is completed, moisture meters to detect potential issues with staining and other issues, and moisture meters that measure the moisture content of floorboards that could cause staining and other issues to emerge.
The Grit
The type of grit used in floor sanding depends on both material removal and the desired finish color. Coarser grits tend to remove more material while leaving deeper scratches behind that require multiple passes with the sander to smooth out. It is also essential to consider the direction of the grain; while going against this grain may create more uniform surfaces, it leaves wood more vulnerable to wear and damage.
Always exercise extreme caution when using any sanding equipment and seek expert advice from a flooring specialist. While you could complete a sanding project on your own, doing it correctly requires specialist knowledge, high-grade equipment, and plenty of hard work. Renting cheaper machines could lead to mistakes that cost money later to correct if done incorrectly.
Once the drum sander has completed its pass over all surfaces, use an edger to reach areas the drum couldn’t. This step is essential in ensuring the sanding process is complete; sharp scratches left by paint scrapers won’t take on an equal finish as surrounding areas. A buffer at 100 or 120 grit can smooth away scratch patterns to blend straight sanding from the drum with circular sanding from an edger and ensure an effective result.
The Sequence
Have you ever watched a professional floor contractor sand a hardwood floor? There are numerous steps involved. Correct sanding requires progressing through various grits in an organized sequence so each pass removes only a thin wear layer while revealing fresh wood. This allows multiple refinishing sessions and prolongs the overall lifespan while increasing product quality.
Before beginning sanding, it’s essential that you clean and clear your working area using vacuuming, sweeping, and dust-mopping techniques. The next step should be examining your floor for damages, such as repairs or water stains that might require bleach explicitly formulated for wood floors to help remove. However, bleach may only temporarily cover damaged spots; ultimately, it may be best to replace that section entirely.
As part of your sanding sequence planning, it is also crucial that you select an effective sequence because skipping any one grit may present issues. Even in excellent conditions, even small skips in the sequence may create deep scratches into the finish and damage the wood beneath; this damage can manifest as early wear in high-traffic areas and make future refinishing tasks harder than necessary.
The Final Pass
Once the center area of a room has been sanded, the next step should be edge sanding to remove any remaining finish that your belt or drum sander cannot reach. You can do this using a 100-grit sanding screen on a buffer for added smoothness when making repairs to make the repairs compatible with floor finishes.
Fill the gaps between floorboards using clear wood filler (like Bona Mix and Fill or Fiddes wood filler gel ). This will blend in perfectly with the color of your new finish while helping protect it from moisture damage and preserve newly sanded areas of floorboards.
Before returning to sanding, make sure you sweep and vacuum your entire room thoroughly to remove any nails or screws that could potentially tear apart the sanding belt or gouge the drum, potentially costing thousands in damage repairs.
To ensure the most efficient sanding sequence, always begin with the lightest abrasive that will achieve your objective, gradually moving through each grade with each pass – but never more than one grade apart between passes – or else “hitchhikers” could get stuck to surfaces and cause severe scratches to develop on them. Also, be sure to clean your equipment between each grade to eliminate this risk.
Read also: What You Need To Know About Mobile Home Demolition