Ever spent hours trying to create a simple poster, only for it to look a little… messy? Imagine this: you need a ‘Merdeka Day Sale’ graphic for your business’s Instagram page by lunchtime, but you’re stuck. For many Malaysian small business owners and staff, this frustration is a daily reality. You have a great idea, but making it look professional on screen feels almost impossible. The best guide to finding Canva training Malaysia.
This is where Canva changes the game for non-designers. Think of it not as complex software, but as a digital toolbox filled with thousands of ready-made templates. Instead of facing a blank, intimidating page, you start with a design that is already 90% complete. In practice, what once took hours can now be finished in minutes, allowing you to create impressive visuals without hiring a professional.
This guide will help you learn Canva fast, starting with the essential skills to produce your first design today. We will also explore how to choose the right Canva training in Malaysia, ensuring you can bring any promotional or business idea to life quickly and beautifully.
Your First Stunning Design in 5 Minutes: A Step-by-Step Guide
The secret to creating something beautiful in minutes is using Canva’s templates. For anyone in Malaysia who isn’t a designer, this is a major advantage. Think of templates as professionally designed layouts where you just fill in the blanks. This is the fastest way for beginners to learn Canva and get immediate results.
Ready to see how easy it is? Here is a simple step-by-step guide to creating in Canva for the first time.
- Search for Your Design: On the Canva homepage, type what you want to make into the search bar. For example, try “Instagram post,” “poster,” or “name card.”
- Choose a Template: You will see thousands of options. Scroll through and click on a design that you like the look of. Don’t worry, you can change everything!
- Edit the Content: To change any words, just double-click on the text box and type your own message. To change a photo, simply drag your own picture from your computer and drop it on top of the existing one.
- Download Your Creation: Once you’re happy, click the Share button (usually in the top-right corner) and then click Download. Your new design is now saved and ready to use.
That’s it! You’ve just created a high-quality visual without any design experience. This simple process works for almost any project, from a quick social media update to a flyer for your next sale.
But what if you want to change the colours to match your brand, or use a specific font? Making a template truly yours is the next step to unlocking Canva’s power.
Making a Template Truly Yours: The 3-Click Customisation Method
A great template is a fantastic start, but the real magic happens when you make it match your own brand or event. You don’t need to be a professional to do this. Customising colours is as easy as clicking. Simply select any part of the design—like a background, shape, or text—and a small colour square will appear in the top-left corner. Click that square to open the colour palette and choose a new shade that fits your style. This one small change can instantly make a generic template feel like it was made just for you.
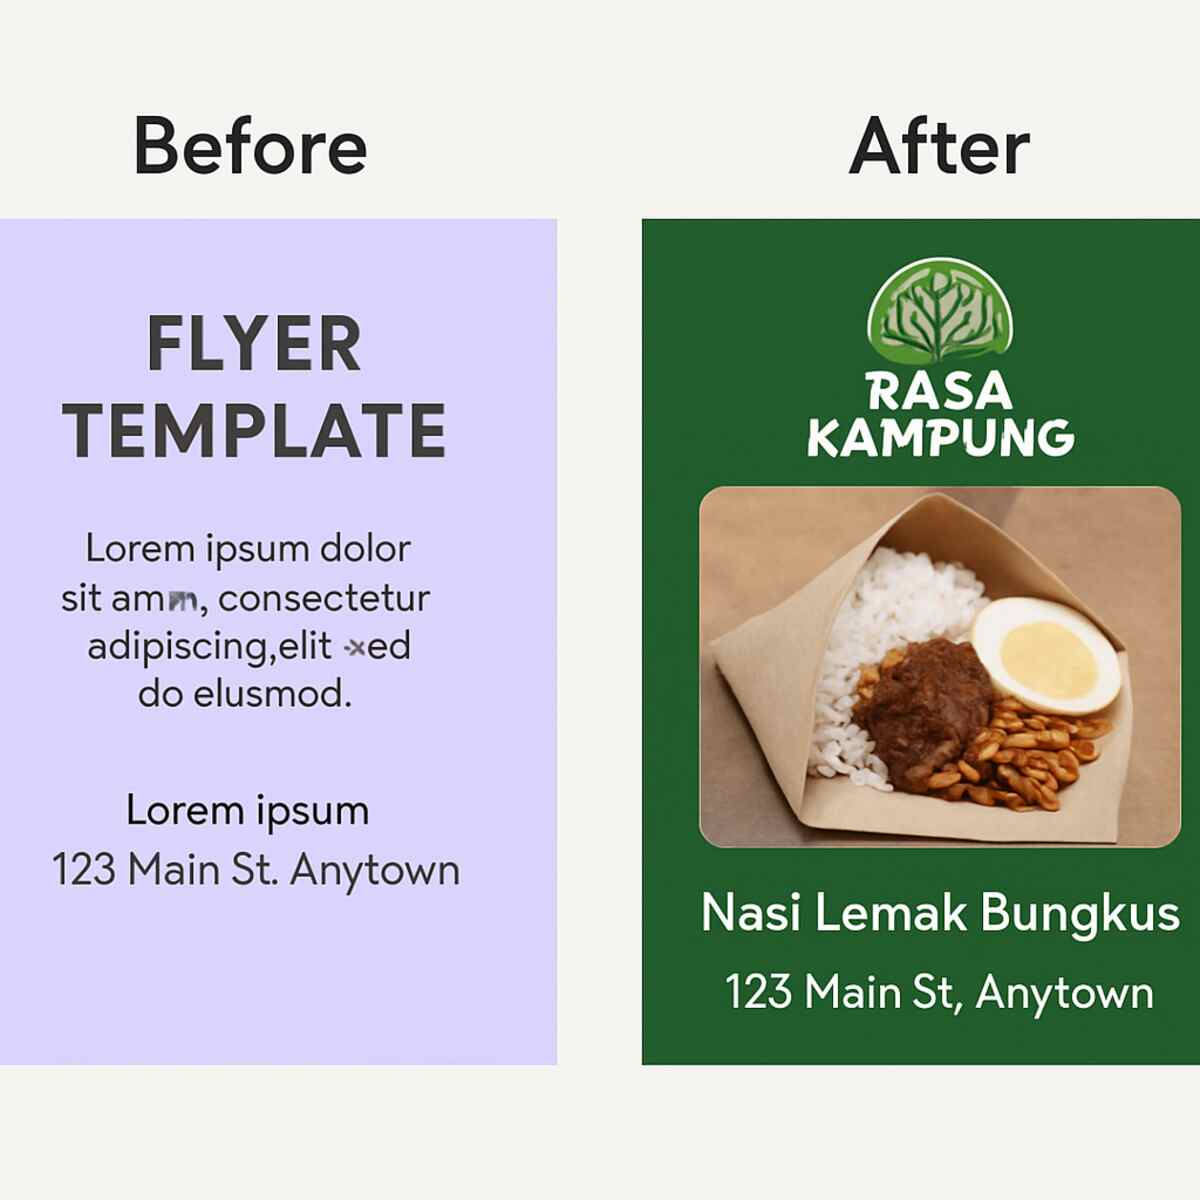
Beyond colours, making the design truly yours means using your own fonts and pictures. To change the writing style, just click on any text and use the font menu at the top of the screen to find one that better suits your message. To add your own logo or a product photo, look for the Uploads tab on the left-side menu. Think of this as your personal photo library inside Canva. You can upload images from your computer and simply drag them into your design, as seen in the Nasi Lemak example below.
Just look at the difference these small tweaks make! This simple customisation process is the core of any good Canva design training and is the fastest way to create professional visuals. Now that you’ve created and personalised your beautiful design, you need to save it correctly. But which option should you choose?
Don’t Get Confused: When to Use JPG, PNG, or PDF in Malaysia
After creating your design, you’ll hit ‘Download’ and see a list of file types like JPG, PNG, and PDF. Which one is right? For most social media posts or images you plan to send via WhatsApp, JPG is your best choice. It keeps the file size small for fast sharing, which is essential when you’re running a small business on Canva and need to post updates quickly. This ensures your beautiful promotions don’t use up all your customers’ data.
But what if you need to place your logo onto a photo without that ugly white box around it? This is where PNG is your hero. A PNG file can have a transparent background, so your graphics blend in seamlessly for a clean, professional look. This trick instantly makes your work look more polished and thoughtfully made.
Finally, for anything you take to a print shop—like flyers, posters, or name cards—always choose PDF Print. This format saves your work in the highest possible quality, ensuring your text is razor-sharp and your colours are rich and accurate when printed. Knowing which file to use is a simple but crucial step to learn graphic design with Canva from scratch.
The Digital Toolbox: Finding Perfect Graphics in Canva’s ‘Elements’ Tab
A great design is more than just text and photos. To make your visuals truly pop, you need shapes, icons, and illustrations. This is where Canva’s “Elements” tab comes in. Think of it as a digital treasure chest located on the left-side menu of your editor. It’s filled with millions of graphics, from simple lines and arrows to detailed illustrations of local food. For any Canva for beginners journey, exploring the Elements tab is the key to moving beyond basic templates and adding your own creative flair.
Finding the right graphic is incredibly simple. Let’s say you’re a real estate agent creating a social media post. Instead of just writing “New Listing,” you can go to the Elements tab and search for a “house icon.” Instantly, you’ll have hundreds of options to drag onto your design. Using specific Canva elements like this makes your message clearer and more visually appealing, helping you grab attention in a crowded feed. It’s a small step that makes your work look much more thoughtful and professional.
As you browse, you’ll see some items marked with a small crown, which are part of the paid subscription. To stick to your budget, here’s a crucial tip: after searching, click the filter icon next to the search bar and select “Free.” This filters out all the paid options, showing you a huge library of graphics you can use at no cost. While this is great for starting, one of the most popular reasons people upgrade is for advanced tools, particularly one game-changing feature.
The One-Click Wow Factor: How to Use Canva’s Background Remover
Have you ever taken the perfect photo of your product—a delicious cake or a beautiful handmade accessory—only to be let down by a distracting or messy background? For many small business owners, this is a constant challenge. The Background Remover, a standout feature in Canva Pro, solves this problem instantly. With a single click, it magically erases the background from your image, leaving you with a clean, professional-looking cutout of your subject.
This simple trick is one of the most effective advanced Canva design techniques for making your products stand out. A clean product photo without a busy background looks more trustworthy and allows customers to focus on what you’re selling. Suddenly, that photo taken on your kitchen table can be placed on a branded social media post, a promotional flyer, or your website, looking like it came from a professional studio. It’s a game-changer for anyone using Canva for their small business.
For many users, this tool alone makes the upgrade to Pro worthwhile. It’s a perfect example of how mastering Canva Pro features can elevate your brand. While powerful tools like this make each individual design look amazing, the next step is ensuring all your designs are consistent. To do that and save hours every week, you need to organise your brand assets properly.
Save Hours Every Week: Why You Need a Canva Brand Kit
Creating a new design often involves a frustrating hunt. First, you search through your computer’s folders for the correct logo file—not the blurry one from WhatsApp! Then, you try to guess the exact shade of red you used in your last post, often getting it just slightly wrong. This small inconsistency might seem minor, but over time, it can make your brand feel less professional and cohesive to your customers.
This is the exact problem the Canva Brand Kit solves. Think of it as your own digital stationery drawer, neatly organised and always within reach inside Canva Pro. Here, you upload all versions of your logo, save the exact shades of your brand colours, and set your specific fonts. The result is perfect brand consistency. Every design, from a quick social media update to a formal proposal, will look like it came from the same polished brand, building crucial trust with your audience.
Beyond just looking professional, the true magic of the Brand Kit is speed. With your brand assets available with a single click inside the editor, creating on-brand visuals shrinks from minutes down to seconds. You’re no longer hunting, guessing, or uploading; you’re just creating. This efficiency is why the feature is a cornerstone of effective corporate Canva training. With powerful tools like the Brand Kit and Background Remover in mind, the big question becomes clear.
Is Canva Pro Worth It for a Malaysian User?
The big question is always about the price. For a small business owner or freelancer in Malaysia, every ringgit counts. The monthly cost of Canva Pro is often less than what you’d pay for a single design from a freelancer or two cups of fancy coffee. When you look at what you get in return, the value becomes clear. It’s an investment in your brand’s speed and professionalism, giving you access to tools that were once reserved for design agencies.
Imagine this: you’ve created the perfect Instagram post for your new product. Now you need a Facebook banner and an Instagram Story with the same design. With the free version, you’d have to start over, rebuilding each one. Canva Pro’s Magic Resize feature solves this instantly. With one click, it reformats your original design for any platform you need, saving you from repetitive and time-consuming work. This alone is a massive time-saver for anyone managing multiple social media accounts.
Beyond just resizing, Canva Pro unlocks a treasure chest of over 100 million premium photos, graphics, and videos. You’ll no longer see the same free images everyone else is using or worry about paying for individual stock photos. This massive library ensures you can always find a unique, high-quality visual that makes your business look polished and trustworthy. This is a key part of mastering Canva Pro features—elevating your brand beyond the generic.
When you combine the consistency of the Brand Kit, the speed of Magic Resize, and this endless library of assets, the benefits are powerful. But having the tools is only half the battle. Knowing how to use them strategically is what truly separates great design from average ones. This is why many users explore structured Canva training in Malaysia to bridge that gap.
From Self-Taught to Strategic: Why a Canva Workshop is Your Next Step
Playing around in Canva is how most of us begin. You quickly learn how to change text, add a photo, and maybe even find a cool graphic. But soon, you might hit a wall. Your designs look okay, but not quite professional. You know how to use the tools, but you sense something is still missing to make your posters and posts truly pop and attract customers. You’re not alone in feeling this way; it’s a very common plateau for self-taught users.
This creative block often happens because we unknowingly develop inefficient habits. For instance, you might spend ten minutes trying to perfectly centre text by eye, not realising there’s a one-click tool that does it flawlessly in a second. A dedicated Canva workshop for small businesses isn’t just about showing you new tricks; it helps you unlearn these time-wasting methods, making your entire design process faster and much less frustrating. It streamlines your workflow so you can focus on the message, not the mechanics.
But is a Canva course worth it if you already know the basics? The difference is strategy. A great course teaches you the simple but powerful design principles behind every good-looking visual—the ‘why’ behind the ‘how’. Instead of just placing elements on a page, you learn how to guide a customer’s eye with the right colours, fonts, and spacing. Finding the best Canva certification in Malaysia helps you make that leap from simply using a tool to creating strategic assets that truly help grow your business.
Online vs. In-Person: Choosing the Right Canva Training in Malaysia
So, you’re ready to level up your Canva skills. The first big decision is choosing how you want to learn. Do you prefer the flexibility of learning from home or the hands-on guidance of a physical classroom? Both paths lead to the same goal, but the journey is quite different.
A flexible Canva online training program gives you the freedom to learn anytime, anywhere in Malaysia, fitting lessons around your busy life. This is ideal if you’re juggling a job, family, or business. The main challenge, however, is that you need self-discipline to complete the course, and you can’t get instant help if you get stuck.
On the other hand, in-person workshops provide direct, face-to-face support. For those looking for Canva experts in Kuala Lumpur for immediate feedback, this is an excellent option. You can ask questions as they pop up and even network with other local business owners. The trade-off is committing to a fixed schedule and factoring in travel time.
Ultimately, there’s no wrong answer. The best Canva training Malaysia offers is the one that fits your life and learning habits. For businesses looking to train their staff, another important consideration can make the decision easier: funding. In fact, many professional courses may be eligible for subsidies, significantly reducing the cost.
HRDF Claimable Canva Course: What It Means for Malaysian Companies
You may have seen the term “HRDF Claimable” or “HRD Corp Claimable” next to professional courses. In Malaysia, many companies contribute a small monthly levy to the Human Resources Development Corporation (HRD Corp), formerly known as HRDF. Think of this as a dedicated company fund, specifically set aside for upskilling employees. This system is designed to encourage businesses to invest in their people without feeling the full financial burden.
The way it works is straightforward. When a company enrolls its staff in an approved training program, it can claim back the course fees from its HRD Corp account. An HRDF claimable Canva course is simply one that has been officially registered and approved by HRD Corp for this purpose. This makes it an incredibly strategic choice for businesses looking to provide corporate Canva training for marketing teams, administrative staff, or anyone who needs to create visuals.
For businesses, this is a game-changer. It means you can equip your team with valuable design skills through professional Canva training in Malaysia at a significantly subsidised cost, or sometimes even for free. Instead of being a new expense, the training is paid for by funds your company has already allocated. With the cost barrier lowered, your focus can shift from “Can we afford this?” to “Which course will deliver the best results for our team?”
What to Look For in the “Best Canva Certification in Malaysia”
With your company’s HRD Corp funds ready or your personal budget set, the next question is crucial: how do you choose a course that’s actually worth it? Not all training is created equal, and finding the best Canva certification in Malaysia involves looking beyond just the price tag. The right choice can empower you, while the wrong one can be a waste of a day.
First, examine the curriculum closely. Canva is constantly updating with powerful new features like AI tools and advanced video functions. A good course must be current, teaching you the latest features that save you the most time. Check if the course content is practical for your needs. Will it teach you how to create stunning visuals for social media, or is it focused on corporate reports you’ll never make? A relevant curriculum is the foundation of any great Canva design training.
Beyond the topics, the instructor is key. Learning from someone who simply knows the software is different from learning from a professional who uses it daily to get real business results. Look for a trainer who has a background as a marketer, a business owner, or a social media manager. They can offer real-world advice and shortcuts that you won’t find in a manual, which is especially vital for a practical Canva course for social media managers.
Finally, consider what happens after the training day is over. The best courses provide some form of post-course support, whether it’s a private WhatsApp group for students or direct access to the instructor for follow-up questions. This ongoing support is what truly helps you grow, giving you a safety net when you get stuck on a real project a week later.
Canva vs. Adobe Express Training: Which Is Better for Beginners?
As you consider training, you’ll likely hear about Canva’s biggest competitor: Adobe Express. Both platforms promise to help you create professional-looking graphics without being a designer, which can make choosing where to invest your time feel confusing. When comparing Canva vs. Adobe Express training, the most important question for a beginner is: which one will help me create what I need, faster?
For most non-designers, Canva is often the winner in terms of speed and simplicity. Think of it as a powerful, all-in-one workshop where every tool is clearly labelled and easy to find. In contrast, Adobe Express is part of a larger “software ecosystem,” meaning it’s designed to work alongside other professional Adobe tools like Photoshop. While this is a huge advantage for professional designers, it can add a layer of complexity for someone who just needs to design a quick promotional poster for a Facebook page.
Ultimately, the goal is to get great results with minimal frustration. To learn graphic design with Canva is typically the more direct path for a small business owner, marketer, or student in Malaysia. Its intuitive layout means a good Canva tutorial for non-designers can get you creating impressive visuals in minutes, not hours. By focusing on this single, user-friendly tool first, you build a strong and practical foundation for all your future design needs.
Your 3-Step Action Plan to Becoming a Confident Canva Creator
Just a short while ago, creating a professional-looking poster or social media post might have felt out of reach. You knew what you wanted to say, but making it look good was the hard part. Now, you see that the barrier to great design isn’t a lack of artistic talent—it’s simply knowing the right tool and the first few steps to take.
Knowledge is potential, but action is power. To turn what you’ve just learned into a real skill, you need a clear plan for what to do next. Your journey from a passive reader to an active creator starts now with this simple, three-step plan.
Here’s how to begin your journey with Canva:
- Start Today: Open a free Canva account and find a ‘Hari Raya’ greeting card template. Change the text and colours. See how easy it is to make something yours in just five minutes.
- Focus This Week: Dedicate 30 minutes to mastering one powerful feature. Try using the Background Remover on a product photo to instantly make it look more professional.
- Explore Your Options: Do a quick search for an “HRDF claimable Canva course” or “online Canva training Malaysia” to see what structured learning paths are available.
This isn’t about becoming a graphic designer overnight. It’s about empowering yourself to communicate your ideas with confidence and clarity. Each small step you take builds momentum. Your first beautiful design is waiting.